...
- Navigate to Payroll > Payroll Employees > Employee List.
- Click on the three (3) dots next to the employee's name to see their detailed information.
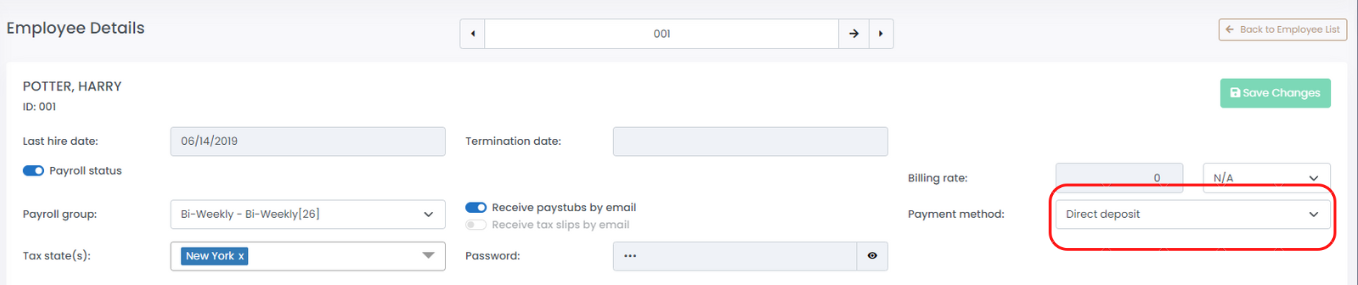
- At the top of the employee's profile, you will see the "Payment Method" field. Select "Direct Deposit" from the dropdown list.
- Click the 'Bank Accounts' tab.
- If the employee has more than one bank account that you will depositing funds into, determine if you want to split it by percentage (80% + 20%) or by amount ($1000 + remaining balance). Click on the appropriate button to confirm.
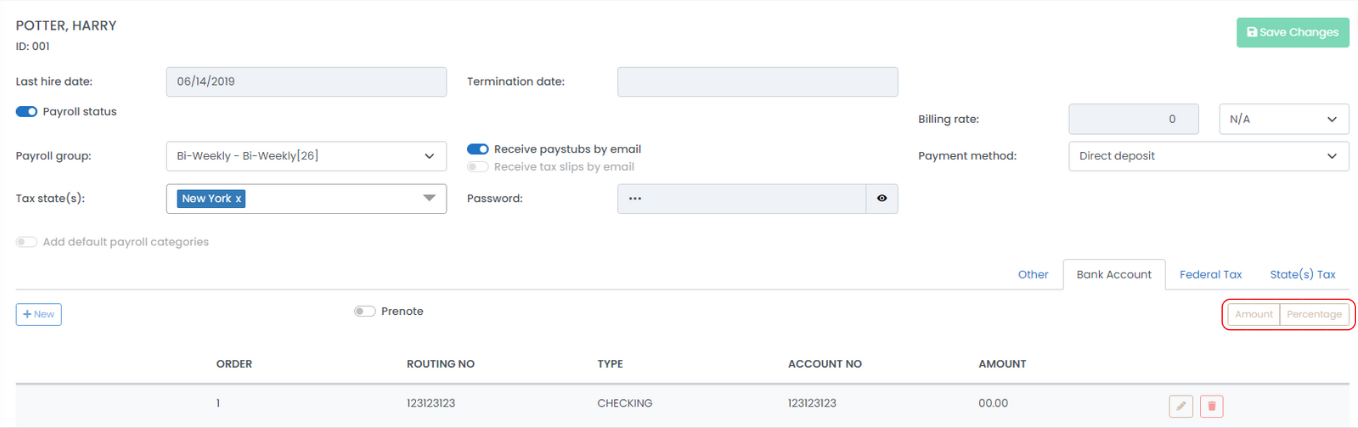
- Click "+ New" to create a new bank account.
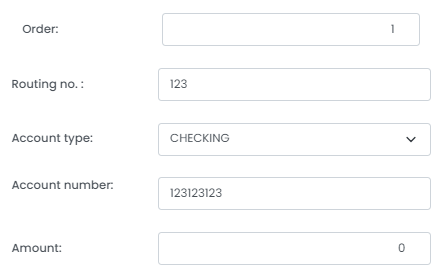
- Enter the employee's banking information.
- "Order" refers to the order of which the funds will be deposited. Enter "1" for the employee's main bank account. Enter "2" and so on for the remaining bank accounts (if more than one).
- "Routing No." identifies the banking institution of your employee's bank account. Your employee should provide you with this number.
- "Account Type" refers to the type of account it is, either checking, savings, or a credit card.
- "Account Number" refers to your employee's bank account number. Your employee should provide you with this number.
- "Amount" (if selected Amount earlier) refers to the dollar amount that will be deposited into this bank account. Enter "0" for the whole or remaining balance.
- "Percentage" (if selected Percentage earlier) refers to the percentage of the employee's income that will be deposited into this bank account. Ensure that all bank accounts have a total percentage of 100%.

- Click "Save" to save your changes.
- Repeat steps 2 through 8 for each employee being paid by direct deposit.
...
- Navigate to Payroll > Admin Settings > Company Bank Accounts.
- Select the three (3) dots next to "ACH".

- Checkmark "Company Bank" at the top of the window.
- For "Bank Interface Groups", select 'ACH'. Enter the applicable information.
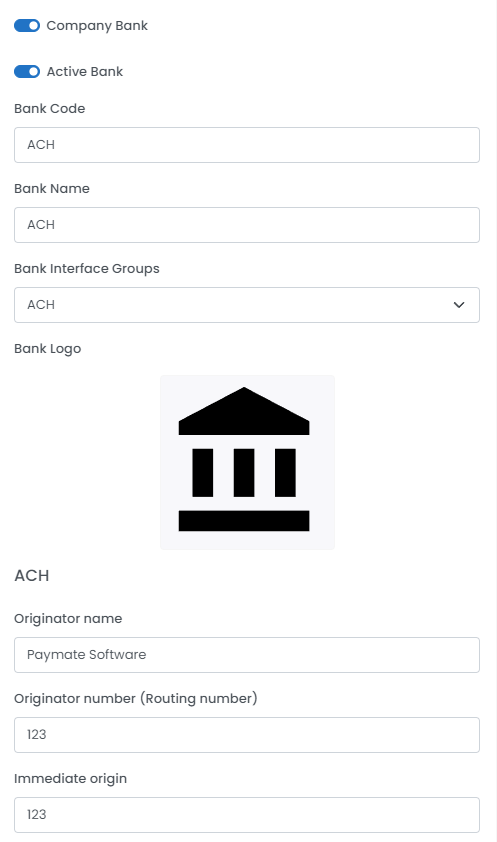
- Once all fields are complete, click "Save" to save your changes.
...
A document describing the file specification from the source, NACHA, can be found here as of 2 January, 2015. An internet search for NACHA file specification can find similar results.
| Harmony Field | Field Position | NACHA Name | Notes |
|---|---|---|---|
| "Originator Name" | File Header Record 64-86 | Immediate Origin Name | Most often, this is your company name. |
| "Originator Number (Routing Number)" | Company Batch Header 80-87 | Originating DFI ID | Also appears in Detail and Batch Control Record |
| "Originator Number (Routing Number)" | Detail Record 80-87 | Trace number | It's only part of the trace number |
| "Originator Number (Routing Number)" | Batch Control Record 80-87 | Originating DFI ID | Also appears in Detail and Batch Control Record |
| "Immediate Origin" | File Header Record 14-23 | Immediate origin | This may be a 10-digit number of your company. |
| "Destination Name" | File Header Record 41-63 | Immediate destination name | Often: FEDERAL RESERVE BANK |
| "Immediate Destination Number" | File Header Record 4-13 | Immediate destination | This may be your transit routing number. |
| "File Creation ID" | File Header Record 34 | File ID Modifier | Usually A but can be 0-9 or A-Z |
| "Entry Description" | Company Batch Header 54-63 | Entry Description | |
| "Identification Code Designator" | Company Batch Header 41 | Company ID (1) | See below |
| "Company Identification | Company Batch Header 42-50 | Company ID (2-10) | See below |
| "User Assigned" | Only required if "Company Identification" is set to 'User Assigned' | ||
| "Service Class Code" | Company Batch Header 2-4 | Service Class Code | 220 is for deposits to employees, use 200 if reversals are included Only required if "Company Identification" is set to 'EIN' |
| "Service Class Code" | Batch Control Record 2-4 | Service Class Code | 220 is for deposits to employees, use 200 if reversals are included Only required if "Company Identification" is set to 'EIN' |
...